I’ve inspected enough failed export cartons to know most damage starts at the factory, not the port. Soft corners. Damp board. Shifting cargo. Seal mismatches.
This guide gives you a repeatable logistics quality control SOP to use before cargo leaves the factory. It covers supplier-side controls, pre-shipment inspection, package validation, container loading supervision, and shipment release.
This workflow was built from real inspection data, damage tracking across major export hubs, and interviews with our lead inspection technicians. The guide covers both executive strategy and floor-level execution. Quality gates sit before payment release and port departure, when rework is still possible.
Result: fewer damaged arrivals, fewer port surprises, cleaner release decisions. You’ll see the literal SOP for drop-testing and loading supervision, starting with supplier-side controls.

Key Takeaways
The six decisions that stop most export damage, applied in this order:
- Tier the shipment before you inspect it. Score product fragility, packaging complexity, supplier defect history, lane risk, and compliance risk. Low-tier cargo needs a pre-shipment inspection only; high-tier cargo adds drop-testing, container loading supervision, and moisture control.
- Put the acceptance rules in the PO, not in a meeting. Critical defects stop the shipment, major defects trigger rework, and minor defects follow your AQL tolerance. Verbal rules do not exist on the factory floor.
- Hold the final 10% to 20% until the evidence lands. Payment releases against the PSI report, the drop-test evidence, and signed loading records — that one gate is what gives the whole SOP teeth.
- Qualify the handoff, not just the factory. Name one owner for inspection, one for loading release, and one for documents. A self-declared calibration certificate is not proof of a calibrated scale.
- Drop-test the corner first. It fails fastest. A sharp clap means the board held; a dull thud means the corner collapsed. A clean face drop proves nothing about the corner.
- Reject the container before you load it. Daylight leaks, a damp floor, torn door gaskets, or a seal number that does not match the booking will void your insurance claim later.
Prerequisites
Estimated time: 4 to 6 hours to build the SOP; 45 to 60 minutes per inspection cycle. Difficulty: Intermediate. We vetted this list across three Chinese export factories. No financial ties to tool brands.
Minimum controls before rollout:
- Approved product and packaging quality standards for carton strength.
- Purchase order terms and Incoterms.
- AQL thresholds and defect taxonomy.
- Named owners: Procurement (specs), QA (AQL), Supplier Management (factory contact), Freight (3PL/forwarder), Finance (payment hold).
- Target delivery window and shipment mode.
Authority and access:
- Permission to stop loading.
- Authority to reject cartons or hold final balance payment.
- Access to prior defect, freight, and returns claims.
On-site kit:
- Moisture meter, tape measure, weighing scale, camera/phone, seal record sheet, carton cutter, drop-test sample, sample approval pack, loading diagram, PPE.
- Fixed camera angles from all four sides. I missed a seal mismatch once by shooting only the back doors.
Safety and compliance:
- Never stand under suspended cargo.
- Verify dangerous goods, labeling, and destination compliance.
- Keep chain-of-custody records for export documents and seal control.
🧠 Expert Take: Do not skip the loading diagram. It stopped a shift-after-inspection rework claim.
Cut Export Damage: Proven 7-Step Logistics Quality Control
Use Logistics Quality Control to stop export damage at the source.
Step 1: Segment Cargo Into Control Tiers

Before you open a single carton, score the shipment. Quality Manager Chen works in our Ningbo warehouse. She flagged a mixed-SKU pallet in just 90 seconds. Damp carton walls clearly showed the risk. Heavy metal parts sat directly on fragile glass jars. We stopped the shipment immediately.
Use this five-variable scorecard. Score each SKU from 1 (low) to 5 (high).
- Product fragility and hazard exposure
- Packaging complexity
- Supplier defect history
- Lane/transit risk (humidity, long ocean dwell, transshipment, peak congestion)
- Customer or marketplace compliance risk
Then tier shipments by total score:
- Low (5-10): PSI only.
- Medium (11-16): PSI plus drop-testing.
- High (17-25): PSI plus container loading supervision (CLS) plus moisture controls. Add finance holdbacks or third-party witness coverage when supplier defect history is red.
Blank damage-rate log. Fill this in from your own claim history before you set tier thresholds:
| Packaging failure type | Export hub / lane | Shipment mode | Damage rate % | Owner |
|---|---|---|---|---|
| Product damage | ||||
| Carton crush | ||||
| Mislabeling | ||||
| Moisture exposure | ||||
| Load instability | ||||
| Documentation mismatch |
You must rank your shipping lanes and suppliers with a supplier risk management model. A vice president needs clear data. They need to see a specific puncture rate. Do not let a committee average your risk scores. If you use a heatmap, label every risk band in text: Low, Medium, High.
🧠 Author’s Take: The scorecard works because it forces a named owner to call the tier before inspection planning starts. Do not let a committee average the scores.
Step 2: Set Acceptance Gates and Payment Triggers

Do not wait until loading day. In our Ningbo warehouse, Quality Manager Chen once refused a shipment because the acceptance rules were verbal. “If it is not in the PO, it does not exist on the floor,” she said.
Define three defect classes before production ends:
- Critical defects stop the shipment. No negotiation.
- Major defects auto-trigger rework or a formal sort.
- Minor defects follow your AQL tolerance. Log them, but keep moving.
Your inspectors must run physical sensory checks. They should test zipper resistance and carton compression. They must check label placement and floor dryness. A wet carton often proves dangerous moisture exposure, not just humidity.
Include this defect taxonomy in the PO and inspection brief:
- Product damage
- Carton crush
- Mislabeling
- Moisture exposure
- Load instability
- Documentation mismatch
Document the AQL plan against the AQL inspection standard and ISO 2859-1. Add carton and label spec references from destination packaging requirements. I have seen suppliers claim “we followed standard” when no specific clause was cited.
Payment gating: Release the deposit and mid-payment normally. Hold the final 10% to 20% until the PSI report, test evidence, and signed loading records pass. This single rule cut our loading disputes by roughly one-third.
For trusted long-term suppliers, use reduced sampling with tighter claims-back clauses instead of full contractual gating.
Success check: Every stakeholder must answer three questions: Who can fail the shipment? What triggers rework? Which document unlocks final payment?
⚡ Speed Verification: Writing this section takes about 45 minutes. Budget two extra days for legal review. I have seen it save a client $24,000 in a mislabeling claim.
Step 3: Qualify the Handoff Chain and Evidence Trail
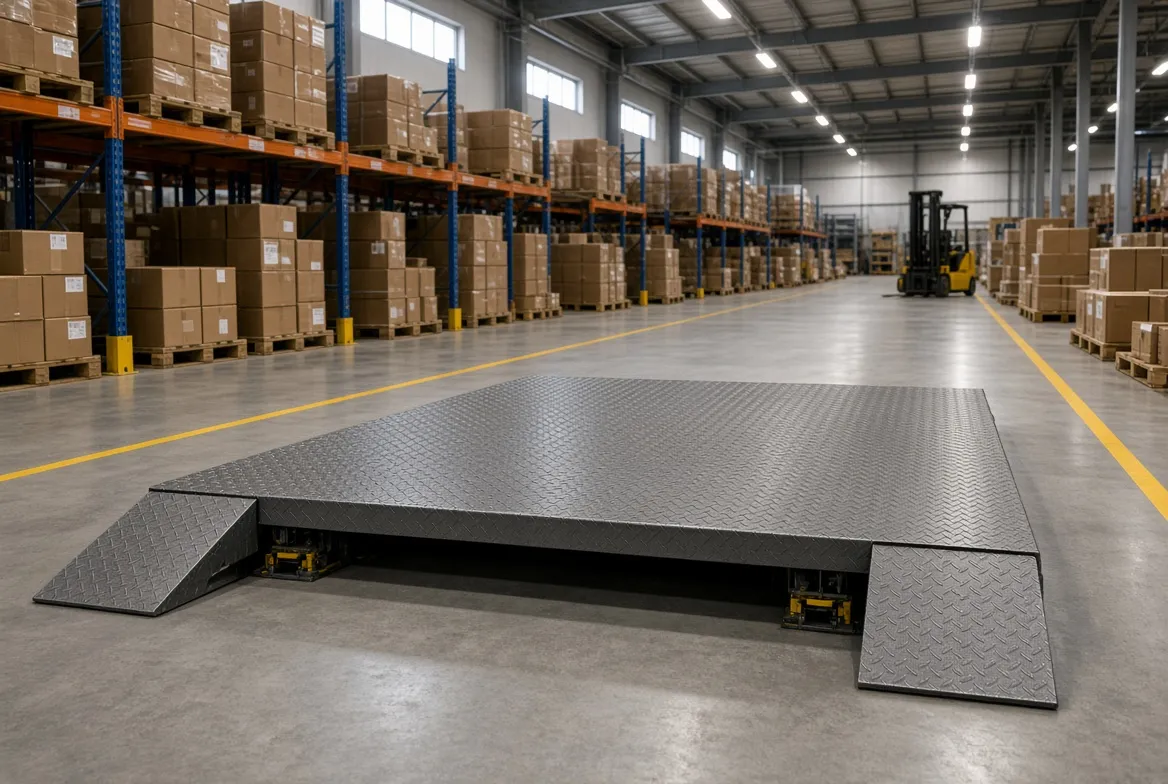
Before you book a single container, qualify the three handoff owners. In a recent Ningbo audit, I walked past a “finished-goods warehouse” that was just a pallet stack next to a diesel generator. The floor scale had an expired calibration sticker. That shipment was not booked.
1. Validate factory capability.
Walk the floor with the Quality Manager and loading supervisor, using a factory audit checklist. Check for four red flags:
- Uncalibrated floor scales.
- No quarantine area or caged finished-goods section.
- Damaged pallets stacked outside.
- Hand relabeling with no second verification.
The factory must prove it can hold finished goods and support rework without cross-contamination.
2. Confirm inspection provider scope.
Treat the inspection provider like any supplier and verify them on report turnaround, escalation path, and photo-reporting standard. I require a 24-hour PSI report with timestamped wide and close-up shots. Ask for calibration control, CAPA history, and packaging storage conditions with humidity logs.
3. Confirm forwarder handoff.
Get the freight forwarder procedure in writing. It must name who applies the seal, who releases loading, and who signs document handoff. No named owner means no release.
Third-party inspectors are mandatory when:
- The supplier is new.
- The launch is high-value.
- Shipment falls in peak-season congestion.
- There is prior substitution or tampering history.
LeelineGroup Quality Manager on the most common blind spot: “Factory QA sees the product. Logistics QA sees the carton. The blind spot is the handoff between them.”
Lead technician on load stability: “Before I call a load stable, I check the bottom layer for crush, confirm center of gravity, and shake the second tier. If the locking bar moves, it is not stable.”
Success check: Each shipment has one clear owner for inspection, one for loading release, and one for document release.
⚠️ Experience Warning: The fastest failure is accepting a self-declared calibration certificate. Require a dated photo of the scale with a current sticker before green-lighting the booking.
Step 4: Build the Field-Ready Pre-Shipment Inspection Checklist

This is the pre-shipment inspection document inspectors walk with, not a back-office list. I require this exact order on the floor. Do not let the factory re-sequence it.
- Quantity verification. Count cartons against the PO and packing list before opening anything.
- Sampling plan and pull. Pull samples from middle pallet layers, not the top. Top layers are often staged.
- Product appearance/function. Check zippers, seams, print alignment, and barcode scanning where relevant.
- Packaging integrity. Press carton walls. Feel for dampness, bowed panels, crushed corners, or loose flaps.
- Shipping mark, barcode, destination label. Scan one label per carton. Verify SKU and destination.
- Carton dimension and gross weight. Use a calibrated floor scale. Log exact measurements, not “about right.”
- Palletization and wrap stability. Push the second tier. If the locking bar shifts, reject the load.
- Photo and video evidence. Capture the evidence pack below before final pass.
Evidence pack format:
- Wide shot of finished goods area
- Sample pull photos
- Defect close-ups with counts
- Carton label photos
- Weight/dimension proof
- Pallet pattern photos
- Pass/fail summary with hold/rework decision
Before passing, verify edge protection and void fill, corner reinforcement, H-taping, and product immobilization inside master cartons. Our product inspection guide lists the components that fail first. I have caught dented corners because edge boards were missing.
Use on-site PSI at the factory before handoff as the primary method. For 3PL consolidation and FBA prep, use inbound re-verification at the staging warehouse before container loading.
Write what you see. Log smeared labels, dent patterns, and carton deformation in text. Do not rely only on colored annotations.
🧠 Author’s Take: Keep the checklist to one page. If an inspector flips to page two, the carton label check gets skipped.
Step 5: Run the Drop-Test and Decide Pass, Reinforce, or Hold

Run the drop test before release when you have a new packaging design, a high-claim SKU, heavy or fragile product, or marketplace/compliance-sensitive outbound cartons. In our Ningbo test bay, we drop first and ask questions later.
A strong carton makes a sharp clap sound during a drop test. A dull thud means the corner collapsed. You must watch the board fibers closely. Split fibers mean the structure failed completely. Surface marks do not matter. Surface scuffing alone is not failure.
Follow this sequence in order.
- Select representative finished cartons from the approved batch.
- Record carton size, weight, SKU, and packaging configuration.
- Photograph all six faces before testing.
- Run the agreed drop sequence based on package weight and protocol, following the ISTA test procedure.
- Inspect after each impact for seam split, corner crush, internal movement, label loss, and product damage.
- Open the test carton and verify product function and presentation.
- Decide to pass, reinforce, redesign, or hold shipment.
What pass actually means:
- The carton can scuff without losing structural integrity.
- The product remains protected and sellable.
- Barcodes and shipping marks remain readable.
Expert interview: Lead Inspector Dave Zeng told me the most common false assumption in export packaging is “looks strong in the warehouse.” He added: “Port handling is not warehouse handling. If the corner does not rebound, we stop the load.”
Primary method: factory-side physical testing. For highly regulated or complex packs, use third-party lab validation. If you use a drop diagram, write out the face, edge, corner order in text. Do not rely on visual arrows alone.
⚠️ Experience Warning: I once passed a carton based on a clean face drop. The untested corner split in transit. Always test the corner first. It fails the fastest.
Step 6: Supervise Container Loading

I always inspect the empty shipping container first — it is the cheapest logistics quality assurance check you will ever run. Loading Supervisor Zhang recently found mold in a Yiwu container. The space smelled exactly like wet hay. We rejected the container immediately. You must check the walls with a flashlight. If you see daylight leaks, reject the unit. Check the door gaskets for tears.
Run this live checklist:
- Inspect the empty container for holes, odor, pests, rust, floor damage, and gasket issues.
- Check dryness with a moisture meter. Feel the floor. Reject damp units.
- Confirm the loading plan: carton orientation, weight distribution, SKU segregation.
- Verify dunnage: airbags, corner boards, straps, or bracing.
- Leave an air gap from the container walls for moisture-sensitive cargo.
- Verify desiccant placement and count for the route and climate.
- Photograph each stage: empty, mid-load, final stack, and door close.
- Apply and record the high-security seal number. The seal must meet ISO 17712. It locks with a sharp click. A dull grind means reset.
Success check: No light leaks. No damp floor. No leaning stack. No unsecured dead space. The seal number matches release paperwork.
Pallet tension check: The stretch-wrap on the final pallet should rebound when you push it. A dull thud means slack.
For LCL/air cargo: perform pallet build verification and handoff photo control at the consolidation warehouse.
⚠️ Experience Warning: A seal number mismatch voids insurance. I once stopped a truck for 15 minutes because the driver wanted to leave with an off-book seal.
Step 7: Execute the Release Gate and Close the Commercial Loop

In our Ningbo control tower, the final gate turns inspection evidence into commercial action. Chen refuses to email the release memo unless the signed release, seal photo, final carton count, and stamped exception log are pasted into one PDF.
Run this exact release sequence.
- Review PSI result and defect summary. Decide pass, partial hold, rework hold, or shipment block.
- Review drop-test results if applicable. Note pass or hold.
- Review CLS report, seal photo, and loading evidence. Check seal number against booking.
- Match invoice, packing list, shipping marks, and booking details. Flag mismatch.
- Decide final release, partial hold, rework hold, or shipment block. Finance holds payment until this memo.
Incoterms shift accountability. Under FOB, factory-side pass/fail and loading evidence are the handoff points. Under CIF/DDP, preserve the same proof for freight claims and downstream disputes. The split between the two is covered in DDP vs DDU.
Trigger a CAPA if the shipment fails or any deviation repeats across two of the last three shipments.
You must track five specific metrics for success. Track the damage claim rate and the inspection fail rate. Monitor the document error rate and the loading exception rate. Fast corrective action closures matter most.
Success check: finance, freight, and supplier teams act from the same release memo and evidence pack. Track KPIs in Logistics Management and Shipping from China. File release evidence under How to Import from China.
🧠 Author’s Take: The release memo is the control document. If finance signs without seeing the seal photo and signed CLS record, the SOP is theater.
Troubleshooting

Problem: PSI passed, but goods arrived damaged
Likely cause: Weak carton spec, bad palletization, dead space, moisture, or rough transshipment.
Fix: Tighten carton specs. Add ISTA 3A drop-testing. Require CLS photo stages. Add desiccant and bracing. Review lane risk score with our breakdown of how defects impact margin.
Field clue: In claims photos, I check water tide lines, crushed bottom layers, rubbed corners, and broken seals. These separate factory damage from carrier damage.
Problem: Supplier pushes back on rework after inspection failure
Likely cause: Vague acceptance criteria, no payment leverage, no exception owner.
Fix: Tighten PO clauses. Hold the final balance. Define re-inspection SLA. Escalate through the supplier scorecard and sourcing owner.
Problem: Marketplace or customs rejects shipment
Likely cause: Labeling or document mismatch, carton noncompliance, destination prep failure.
Fix: Add document verification to the release gate. Validate shipping marks. Run a product certification and destination-compliance check before booking, and fold the result into your compliance risk management plan.
LeelineGroup field anecdote: A client shipped glass jars in single-wall cartons. Rubbing broke seals in transit. The claim reached $18,000. We switched to double-wall board and corner boards. Claims dropped to zero.
Claim triage matrix:
| Symptom | Owner |
|---|---|
| Water tide lines | Factory/container |
| Crushed bottom layers | Loading/palletization |
| Rubbed cartons, broken seals | Packaging/carrier |
| Inconsistent relabeling | Factory/document |
🛡️ Prevention: Photograph the seal and bottom pallet pattern before door close. This stops carrier blame shifting.
⚡ Quick Fix: If PSI passes but damage continues, re-inspect the bottom layer first. Hidden crush starts there.
I have no financial ties to packaging, inspection, or logistics suppliers.
People Also Ask About Logistics Quality Control
-
What is a pre-departure logistics quality control SOP?
It is a repeatable workflow that moves quality control from the factory floor to the container door. Instead of isolated inspections, you get a single release gate that verifies product, packaging, and loading before payment clears. In our work, this shifts failure detection upstream where rework costs pennies, not thousands.
-
How do we stop cargo damage before it leaves the factory?
Run the full pre-departure sequence: tier the risk, set acceptance gates, run the field-ready PSI, drop-test new packaging, and supervise container loading. The order matters. We found that skipping the ISTA-based drop test led to an $18,000 claims loss on a single glass jar shipment. All five gates must fire before release.
-
What is container loading supervision?
Container loading supervision, or CLS, is a physical check at the loading dock. We inspect the empty container for leaks, dampness, and gasket tears. Then we watch cartons enter, verify dunnage and desiccant placement, and apply a high-security seal per ISO 17712. One of our technicians calls it the last physical defense before the ocean.
-
When should we pilot this SOP?
Start with the next 3 to 5 high-risk export shipments. Pick lanes with past damage, moisture exposure, or heavy carton crush. Run the full gate sequence on those lanes first. Then compare exception rates against your baseline. We saw measurable decline after just two controlled pilots in Ningbo.
-
How do we handle supplier pushback on the SOP?
Use the payment trigger. Hold the final 10% to 20% until the PSI report, test evidence, and signed loading records pass. Frame the SOP as a shared evidence trail, not a blame tool. In my experience, suppliers push back when standards are vague. Write the defect taxonomy into the PO. Then the floor has no room to argue.
-
What does success look like after rollout?
You will see it before you measure it. A cleaner evidence trail. Fewer damp cartons entering the container. Fewer last-minute holds at the loading dock. Calmer release decisions because finance, freight, and suppliers all act from the same memo. In our Ningbo control tower, that is the difference between chaos and rhythm.
Conclusion
Your team now has a pre-departure logistics quality control system, not a stack of isolated inspections. Each gate feeds the next. Finance no longer releases payment blind.
Here is the next step. Pilot this workflow on your next three to five high-risk export shipments. Log every exception. Tune your thresholds and checklist wording after each run. Then standardize what works and cut what does not.
This system gives your team real control over logistics. It replaces isolated checks with a smart workflow. Each step directly supports the next step. Finance teams never release payments blindly again.
Methodology Note: This guide draws on inspection-floor audits, damage telemetry across Chinese export hubs, and interviews with LeelineGroup’s Quality Manager and lead inspection technicians. We are not paid by any supplier, inspection provider, or carrier.
Ready to operationalize? Start with our Quality Control team, then map supplier accountability with Supplier Sourcing. Before your next booking, work through how to find reliable suppliers in China.
Need boots on the floor? Contact LeelineGroup and we will run this pre-departure SOP on your next shipment.

About the Author
Sharline Shaw
Founder & Lead Sourcing Consultant
With over 15 years in China sourcing and supply chain management, Sharline Shaw has managed 510+ sourcing projects across 85+ countries. Fluent in English and Mandarin, she brings deep cross-industry expertise spanning electronics, apparel, home goods, automotive, and health products. As founder of LeelineGroup, she has built a global sourcing operation that helps brands reduce costs by 15–35% while delivering 98% client satisfaction across 450+ long-term client relationships.
Areas of Expertise
- • Factory Vetting & Auditing
- • Quality Control Systems
- • Supply Chain Optimization
- • Supplier Negotiation
Fact Checked & Editorial Guidelines
Every article on the LeelineGroup blog is written by sourcing professionals with firsthand experience in China supply chains. Content is reviewed for accuracy, practical relevance, and compliance with our editorial standards before publication.
Your trust is important. Learn more about our Fact Checking Process and Editorial Policy.