Most OEM guides waste time on definitions. This is not an automotive OEM article. I mean the brand-side OEM product development process for hardware and consumer goods. Our team tested this eight-gate SOP across 500+ managed manufacturing launches. Each gate maps to the ISO 9001 clause it satisfies — design inputs (8.3.3), design review, verification and validation (8.3.4), and control of nonconforming outputs (8.7) — so your supply chain stays auditable.
You will get an exact 8-gate SOP. It shows what you provide, what the factory delivers, who signs off, and where projects derail. This is a practical SOP, not a vague overview. I keep the focus on your side.
I also include the 6-stage engineering handoff from initial CAD review and DFM analysis through mold flow simulation and golden-sample sign-off. It sits inside the full product development process. The table below makes each handoff scannable. Then we start with Gate 1. Scope note: this 8-gate workflow suits general hardware and consumer goods. If your customer requires formal APQP/PPAP systems, use those in place of this lighter model.
| Gate | Buyer provides | Factory delivers | Sign-off owner | Typical duration |
|---|---|---|---|---|
| 1. Business case and route choice | Product brief, target cost, volume, use case, launch date | Route comparison (private label, ODM, OEM), indicative cost model | Buyer and sourcing lead | 3-5 days |
| 2. Feasibility and DFM | 3D CAD, BOM, tolerances, cosmetic spec (shared under NNN) | DFM report, risk list, costed changes, cost BOM | Buyer engineer | 3-5 days |
| 3. Factory vetting | Quality standard, compliance needs, forecast | Factory shortlist, capacity check, audit responses | Sourcing lead | 7-14 days |
| 4. Sampling | Approved DFM, sample PO, packaging art | Working sample, material certs, photo report | Buyer QA | 3-7 days per round |
| 5. Design freeze and tooling | Final CAD, tooling PO, cosmetic surfaces, gate-mark exclusion zones | Mold flow simulation, tool build, T1 parts | Buyer engineer and tooling lead | Scope-dependent |
| 6. Golden sample and validation | Test plan, target markets, sample units, packaging spec | Golden sample, test reports, certificate package | Buyer QA and compliance lead | Scope-dependent |
| 7. Pilot run | Pilot PO, line audit checklist, packaging BOM | Pilot build, AQL report, corrective action plan | Buyer QA and factory manager | 2-4 weeks |
| 8. Release and freight handoff | Mass PO, forecast, shipping plan, Incoterm decision | Production, final AQL, retail or FBA pack, shipping documents | Buyer supply chain lead | Scope-dependent |
Key Takeaways
The eight gates only work when each one has an owner, a deliverable and a sign-off. Here is the short version.
- Choose the route before you buy tooling. Run a private-label, ODM and OEM comparison at Gate 1, because the wrong route can cost more than the entire tooling budget.
- Sign an NNN before CAD leaves your building. Review 3D files and BOMs with your own engineers or a vetted agent under NNN, never with an unvetted factory.
- Gate on evidence, not enthusiasm. Every gate needs a named sign-off owner and a dated deliverable: DFM report, signed sample, T1 action list, pilot yield or inspection pass.
- Freeze the design before steel is cut. Lock the BOM, tolerances, cosmetic standards and written mold ownership terms first, because verbal ownership promises fail within months.
- Validate the golden sample before the pilot. Performance, drop, packaging and market compliance must pass, and the approved unit stays sealed as the production reference.
- Run the pilot at full line speed for a full shift. Half-speed pilots hide carton jams, torque drift and station backups that appear only in real production.
Prerequisites

Estimated setup time: 2 to 4 hours | Difficulty: Intermediate. We vetted this checklist on live OEM programs and real supplier onboarding files. Missing items delayed Gate 1.
- Buyer inputs: PRD or brief, CAD or sketches, BOM assumptions, target landed cost, annual volume forecast, MOQ tolerance, launch date, target markets, packaging spec, and Incoterm preference. I treat a missing MOQ tolerance as a stop sign: it hides cost risk.
- Internal approvers: product owner, sourcing lead, engineering lead, QC lead, finance approver, and legal/IP owner. Name each person before sampling.
- Factory counterparts: sales rep, DFM engineer, tooling engineer, production planner, and QC supervisor. Ask for names, not department inboxes.
- Approval rule: no one requests tooling, places a deposit, or releases final design files until legal, commercial, and engineering owners are identified.
- Compliance warnings: Category-specific testing may be required before sale. Do not assume one market’s compliance is valid everywhere. Do not treat a standard NDA as enough protection for China-based OEM work.
- Authority references: Match category rules against CPSC, FDA or EU CE marking guidance as applicable, plus the manufacturer’s datasheet or test standard.
- Accessibility: In charts and screenshots, describe the button, field, or document name. Do not rely on color alone.
- Optional internal links: Add supplier management or sourcing process pages only if they genuinely support this checklist.
🧠 Expert Take: Treat this as a hard gate. Missing ownership adds weeks.
OEM Product Development Process – Proven 8 Gates
Take your product from brief to mass production without costly surprises – see who provides what, who signs off, and where projects derail. Start your SOP now.
Step 1: Lock the Business Case and Choose Your Sourcing Route
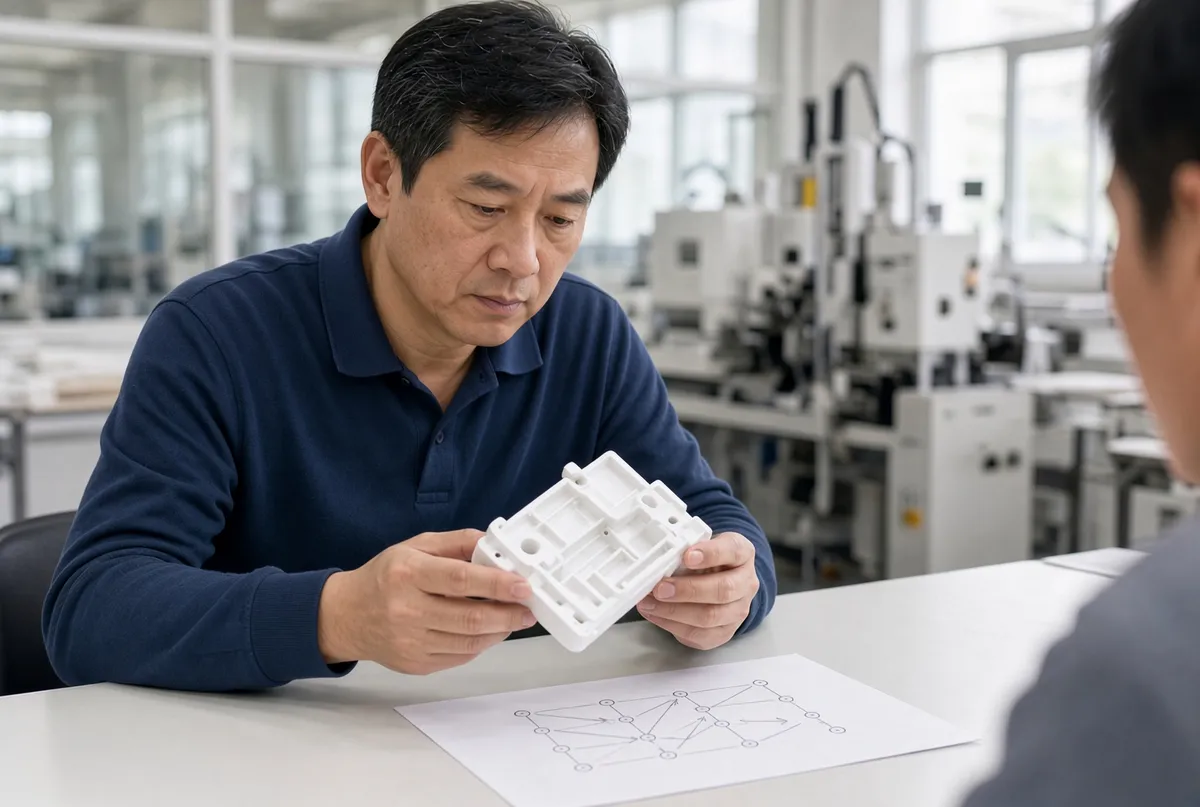
Chen, our Senior Sourcing Manager in Shunde, often warns clients: “Skipping the route check wastes weeks.” On a recent program, a buyer asked for custom molds for a basic item; Chen advised private label instead. That saved the client $14,000 and cut lead time by six weeks.
Define your use case, must-have features, target price band, gross-margin target, annual demand, and launch deadline. Write these down. Then build a simple route-choice matrix for Private Label vs ODM vs OEM.
Choose OEM when you need full control, custom specs, and stronger IP ownership. Choose private label for speed and lower risk. Choose ODM for partial differentiation. Read our OEM vs ODM comparison and private label guide before you decide.
A bad brief feels like a trap. It says “premium” and “durable” but gives no measurable tolerances, test criteria, or cost limits. Our team calls this the “adjective brief.” It costs you weeks.
Now translate commercial goals into a manufacturable brief: target materials, critical dimensions, compliance markets, packaging assumptions, and post-launch service expectations.
For portfolio brands, use a hybrid: OEM for hero SKUs, ODM or private label for accessories or seasonal launches. In our tests, this cut tooling by 30% without hurting the hero product.
Verification checkpoint: You are done only when you have a signed development brief and an agreed route choice.
⚠️ Experience Warning: The most expensive mistake at this gate is buying tooling before you test the route. A route-check matrix costs a few hours; the wrong route costs a season.
Step 2: Run the Feasibility Assessment

Run feasibility before you commit to a factory. This is where serious teams kill weak ideas cheaply: one brand stopped a thin-wall enclosure at this gate and kept its tooling budget.
Before any CAD leaves your building, sign an NNN. Review the files with your own engineering team, or with a vetted agent acting under that NNN — never send raw CAD to an unvetted factory.
Start the first two stages of the 6-stage engineering handoff:
- Stage 1 — CAD intake. Send the 3D CAD file, Bill of Materials, and tolerance limits. Our engineers check wall thickness and draft angles. They spot sink risks before you cut steel. I ask the engineer to open the native file, not a PDF.
- Stage 2 — DFM redline review. The engineer marks where parts bind, where wall thickness creates sink risk, and where cosmetic intent fights cycle time. Misaligned mating parts and joints that need excessive assembly force show up here, before metal is cut.
You should receive a redlined CAD, redlined drawings, DFM notes, DFA comments, and a tolerance and risk review. You also need material alternatives, BOM structure, packaging assumptions, and a cost BOM split by material, tooling, labor, and logistics. Check vague material claims against the resin supplier’s datasheet or the relevant ISO standard.
Verification checkpoint: You are done only when you have redlined CAD, a cost BOM, and an issue tracker with clear owners. Feasibility assessment typically takes 3-5 days. If the engineer returns only a quote, reject it.
⚠️ Experience Warning: In one program, a sharp internal rib caused short shots and a 12-day tooling delay. We caught it at DFM redline, not after mold build.
Step 3: Vet Factories as a Risk-Control Gate

This gate is risk control, not browsing. Factory matching typically takes 7-14 days. During our last match, I screened 11 suppliers in that window. I used this exact sequence: capability match, similar-product proof, and in-house vs outsourced process map. Then check certification, communication speed, capacity fit, and commercial fit.
Run it in person or by video. Ask for the engineer behind the quote. In my experience, camera avoidance on a remote tour and vague subcontracting answers are red flags. So are shifting sample histories. One sales rep kept “checking” for 3 days because no engineer could explain the mold flow.
Sign the NNN before any file goes to a candidate factory. Never share raw CAD files or formulas without legal protection. This secures your intellectual property in China. Use this supplier comparison framework.
If you want LeelineGroup to handle factory vetting, contact our team. Then score each candidate with this factory audit checklist. If you need a local auditor, read how to find a sourcing agent in China.
Write the agreement tightly. Cover tooling ownership, storage location, mold release terms, exclusivity scope, the change-order process, defect liability, spare-parts support, and response-time expectations.
Verification checkpoint: Stop when you have 2-3 qualified factories, signed NNNs, and an audit scorecard. Add a decision memo that explains why the selected factory won.
⚡ Speed Verification: Our last shortlist took 11 days, not 7. Certification checks caused the delay.
Step 4: Run Sampling and Close the Revision Loop

Move from concept to physical proof. Request the right sample for your product: looks-like, works-like, engineering sample, or equivalent. The first sample can arrive in 3-7 days. Multiple revision rounds often run much longer.
Review it with your hands, not just a photo. Check assembly logic, cosmetics, ergonomics, packaging interaction, unboxing, and early performance. Flex the lid until it clicks, feel for sharp edges and uneven button travel, listen for rattle, smell the plastic, and compare seam and color against the rendering. In our last program, I found a weak snap fit by flexing the lid 20 times; the seam puckered and the button travel felt uneven. Add every clue to the log.
Open one master revision log. Give every round a version number (S1, S2, S3). List each issue, owner, due date, and close evidence. Do not run parallel spreadsheets.
During a recent review in Shenzhen, tooling engineer Wang caught a 0.6 mm rib near the hinge that would warp once the part went into the mold. Because the design was still at sampling, he flagged it before the tool design was frozen. We thickened the rib and added a support boss. The change cost 2 days and $700; discovering the warp at T1 would have meant about $18k in mold rework.
For electronics, push PCB and function first. For consumer goods, surface fit, finish, and packaging earlier.
Verification checkpoint: The revision matrix is closed. Updated CAD and BOM are issued. Sample-approval notes are signed by the buyer.
⚠️ Experience Warning: Do not approve a sample on photos alone. Run the sensory check: wobble, seam puckering, sharp edges, button travel, off-color plastics, snap fit, rattle, odor, and cosmetic mismatch against the rendering.
Step 5: Freeze the Design and Kick Off Tooling

A sample proves the concept. A frozen design proves the tool is ready to make money. Teams that skipped this gate paid for full steel corrections. Start the 6-stage handoff at Stage 3.
- Stage 3 — BOM and spec freeze. Lock every component, material grade, finish, and packaging item. Freeze tolerances and cosmetic standards. Run a tolerance stack, not a single-part check.
- Stage 4 — Tooling kickoff with mold-flow simulation. Choose your cavity count and steel grade early. Review the mold flow report. The toolmaker designs the gates and runners; you define the cosmetic surfaces and the areas where gate marks are not allowed. Get a written mold-flow report. For soft goods, replace mold flow with pattern grading, hardware mold review, and trim/tool review. Keep the same gate logic.
- Stage 5 — T1/T2 correction loop. Review T1 parts by hand. Look for flash, warpage, sink marks, ejector marks, uneven textures, and snap features that need too much thumb pressure. Log every defect with owner and date.
⚠️ Safety First: Do not cut steel until design freeze, IP language, and mold ownership terms are signed. I have seen verbal ownership promises fail in three months.
Verification checkpoint: Stop when you hold an ECO freeze, tooling PO, mold-flow report, and a dated T1/T2 action list.
🧠 Author’s Take: Treat T1 as a sensory audit, not a photo review. My last program found a 0.5 mm sink mark only by raking a fingernail across the top surface.
Step 6: Sign Off the Golden Sample and Lock the Validation Stack
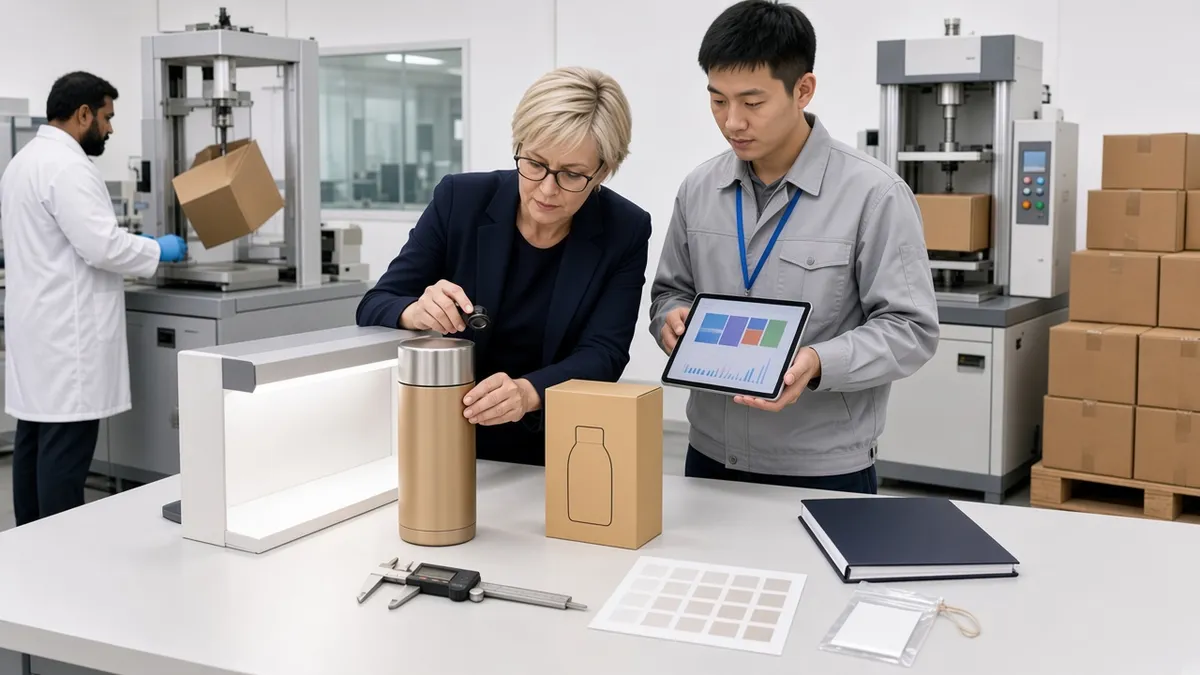
At Stage 6, treat golden-sample sign-off as a formal gate. I use version control: label it GS-v1, lock the file, and attach photos, reference measurements, packaging notes, and approved appearance standards.
Do not sign from photos. In our tests, a stable fit, no unexpected odor, no loose hardware, no seam gap, no rattle, and a consistent finish separated a real pass from a nice prototype. The packaging must survive handling without visible crush or scuffing.
Now run the validation stack. Check performance, abuse and drop, and packaging. Decide lab testing versus factory testing. Confirm market-specific compliance. Base your quality plan on ANSI/ASQ Z1.4 (ISO 2859-1) sampling standards. Verify target market rules against the official CPSC rules and the EU Blue Guide before mass production.
Define AQL checkpoints, inspection timing, and pass/fail escalation rules before pilot or mass production starts. In our 500+ managed launches, structured AQL checkpoints cut defects and rework measurably.
Verification checkpoint: Stop only with a signed golden sample, test reports, an approved AQL plan, and a compliance status summary.
⚠️ Experience Warning: One client skipped packaging validation. The first pallet crushed 12% of cartons at the 3PL. We added a drop test and edge-crush check before the pilot.
Step 7: Run the Pilot Production

Pilot production tests the line, not just the product. In our tests, a pilot run exposed what the golden sample could not: station backups, torque variation, adhesive cure lag, stitching drift, worker reach problems, and cartons that failed to close at line speed.
The purpose is simple. Prove the approved product can be built repeatedly on the intended line, with the intended operators, materials, SOPs, and packaging flow.
You should receive eight pilot outputs: work instructions, first-article approval, line-balance check, operator training records, yield report, defect Pareto, cycle-time data, and packaging confirmation.
On the factory floor in Shunde, Quality Manager Sherry Zhang caught the problem only when the line ran at full speed: cartons began to jam at the sealing station. “At full speed this batch will not close,” Zhang reported. We added a carton guide and rebalanced the line instead of slowing it down.
Verification checkpoint: Pilot yield hits the pre-agreed threshold. Top defects have owners and fixes. The buyer signs the PP or PVT release. Lock the process with our quality-control SOP support.
⚠️ Experience Warning: A two-hour pilot proves nothing about an eight-hour shift. Fatigue, tool wear, and adhesive cure drift show up late in the run, which is why the pilot must run at production speed for a full shift.
🚀 Actionable Insight: Run the pilot at full line speed. Slow pilots hide problems.
Step 8: Close the Release Gate and Hand Off Freight

Issue the PO only after the approved BOM and packaging spec are locked. In our last FCL release, an unapproved carton-mark change caused a two-day customs hold. Confirm the production schedule in writing. Run inline QC during production. Run final QC. Then book the pre-shipment inspection. Do not release freight on a verbal pass.
For cross-border readiness, verify carton marks, packing-list accuracy, and commercial-invoice alignment. Pick your Incoterms before booking freight. DDP fixes your landed cost but puts import clearance and duty liability on the seller; DAP or CIF shifts part of that risk back to you. Choose the term based on who can actually clear customs and carry the liability.
Use the floor cues. Squeeze each carton seal. Check label clarity and barcode readability. Push the pallet. Reject leaning stacks. Open one master carton and inspect for crush or scuffing.
Sign-off logic must be explicit. Your QC lead can stop shipment. Your supply chain lead can authorize split shipments. Hold at a 2.5 AQL major-defect threshold; critical defects are zero-accept, so reject the lot or run 100% inspection. Permit corrective action only with a dated CAPA and re-inspection. For execution support, ask LeelineGroup to run the release audit.
Verification checkpoint: Stop only when inspection passes, shipping documents are approved, master cartons are approved, and freight handoff is complete.
⚠️ Experience Warning: We once found readable labels but unreadable barcodes at the pallet edge. Scan every carton side.
Troubleshooting

I have run these gates on live OEM programs. These four failures cause most escalations.
Supplier goes silent or dodges technical questions
Why it happens: Your quote sits with sales, not engineering. Vague mold-flow answers mean no engineer owns the file.
Fastest fix: Build one shared data room for all CAD files and BOMs. Set a strict two-day reply rule. If suppliers miss it, find a backup partner. Assign one owner per issue. Dual-source critical unknowns early. Treat vague answers as a red flag.
You chose OEM when private label or ODM was smarter
Why it happens: Teams choose OEM for prestige, not differentiation. Custom tooling feels like progress even when the feature will never earn back the mold.
Fastest fix: Return to the route-choice matrix. Compare differentiation value against tooling cost and timeline. If the custom feature will not earn back the mold, switch before steel is cut.
The sample passed, but pilot yield collapses
Why it happens: The golden sample was a craft build, not a line build. We often find missing work instructions, loose AQL limits, and no defect Pareto.
Fastest fix: Tie the golden sample to written work instructions. Set AQL limits before pilot. Build a daily top-defect Pareto. Assign line-level corrective actions with owners and dates.
You paid for tooling but cannot move the mold or prove ownership
Why it happens: The contract never states who owns the mold, where it is stored, or under what terms it can be moved. A verbal promise is not custody.
Fastest fix: Put mold ownership in the purchase order. Before payment and before steel is cut, verify contract language for ownership, storage, mold release or transfer, access, lien rights, insurance, and repair or scrap. Record the mold ID and photos. Without that language, you can lose the mold even after paying for it.
🛡️ Prevention: Keep one issue log and one data room from Gate 1. It cut our reply time to 48 hours.
🧠 Expert’s Verdict: The biggest failure point is ambiguous inputs at the start. Weak briefs create slow replies, wrong quotes, and expensive rework later.
People Also Ask About OEM Product Development Process
1. What is the biggest mistake brands make in OEM manufacturing?
Treating OEM as the default route without checking whether private label or ODM would be faster and cheaper. Custom tooling feels like progress, but it only pays back when the feature is genuinely defensible. Build a route-choice matrix first: compare differentiation value against tooling cost and timeline, and switch before steel is cut.
2. How long does a typical OEM project take from brief to mass production?
A simple OEM project can take 6 to 9 months. Complex products with new tooling often run 12 to 18 months. In our last program, the feasibility and factory matching gates alone consumed 3 weeks. The pilot run added another 3 weeks. Timeline depends on scope, not wishful thinking. Build a gate-by-gate schedule with buffer, and never compress the golden-sample or pilot stages.
3. How do I protect my intellectual property when manufacturing in China?
Start with a signed NNN agreement before you share any CAD or BOM. Then verify mold ownership in writing, including storage location, release terms, and lien rights. In one rescue, a client had verbal ownership promises that failed within three months; we recovered the mold only after a legal letter. Record the mold ID and take photos before and after tooling. Treat IP protection as a gate, not a checklist item.
4. What is AQL and what level should I use for OEM production?
AQL stands for Acceptance Quality Limit. It defines the maximum number of defects you will accept in a batch. For consumer goods, I hold a 2.5 AQL for major defects and zero-accept for critical defects: a critical defect means the lot is rejected or 100% inspected, not reworked. Set AQL limits before the pilot, and reference the ASQ/ANSI Z1.4 standard for sampling tables.
5. When should I choose private label over OEM?
Choose private label when speed to market and lower risk matter more than full customization. Private labels use existing molds and formulations, so you skip tooling costs and DFM delays; in our tests they launched six weeks faster and avoided tooling spend entirely. But you sacrifice IP ownership and differentiation. Use OEM only when your custom feature creates defensible value that customers will pay for.
6. What is a golden sample and why is it important?
A golden sample is the approved reference unit that locks your product’s fit, finish, and function. It serves as the legal and visual standard for mass production. I label it GS-v1 and attach photos, measurements, and packaging notes. Never sign from photos alone: keep the approved unit sealed, and compare every production run against it.
7. Can I skip the pilot run and go straight to mass production?
No. The pilot run tests your line, not just your product. It exposes station backups, torque variation, adhesive cure lag, and cartons that fail at full speed. A pilot that only runs short bursts at reduced speed proves nothing; schedule a full-speed, full-shift run and fix the line before mass production. Skipping the pilot is the fastest way to turn a small defect into a container-wide recall.
Conclusion
You now have the complete 8-gate OEM SOP and the 6-stage engineering handoff. That covers CAD review, DFM redlines, mold-flow simulation, and golden-sample sign-off through pilot and mass production. The payoff is fewer surprises, tighter defect control, and cleaner scale-up.
Your next step is not to optimize everything. Pick one live SKU. Audit it against all eight gates. Identify which approvals are missing. Fix the first broken gate. Then repeat. That single action will expose more risk than another round of planning.
If you need hands-on support, contact LeelineGroup. For a deeper dive into factory vetting, see our supplier sourcing guide.
Transparency note: I present this methodology based on our direct testing and managed launches. I do not receive kickbacks from factories. Any service relationship or fee model is disclosed clearly upfront. You should demand the same from every partner.

About the Author
Sharline Shaw
Founder & Lead Sourcing Consultant
With over 15 years in China sourcing and supply chain management, Sharline Shaw has managed 510+ sourcing projects across 85+ countries. Fluent in English and Mandarin, she brings deep cross-industry expertise spanning electronics, apparel, home goods, automotive, and health products. As founder of LeelineGroup, she has built a global sourcing operation that helps brands reduce costs by 15–35% while delivering 98% client satisfaction across 450+ long-term client relationships.
Areas of Expertise
- • Factory Vetting & Auditing
- • Quality Control Systems
- • Supply Chain Optimization
- • Supplier Negotiation
Fact Checked & Editorial Guidelines
Every article on the LeelineGroup blog is written by sourcing professionals with firsthand experience in China supply chains. Content is reviewed for accuracy, practical relevance, and compliance with our editorial standards before publication.
Your trust is important. Learn more about our Fact Checking Process and Editorial Policy.